
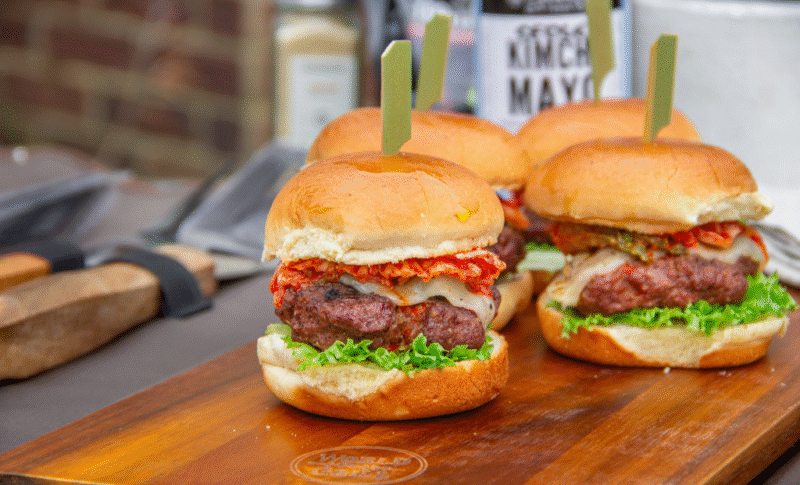

I love my kimchi burger sliders. I mean who wouldn’t love a few bites sliders?
Summer is a wonderful time for grilling and enjoying the abundance of fresh produce.
While I may not be a big fan of summer in general, I always make the most of it by indulging in delicious grilled meals, going to the pool, or taking a mini vacation close to the beach.
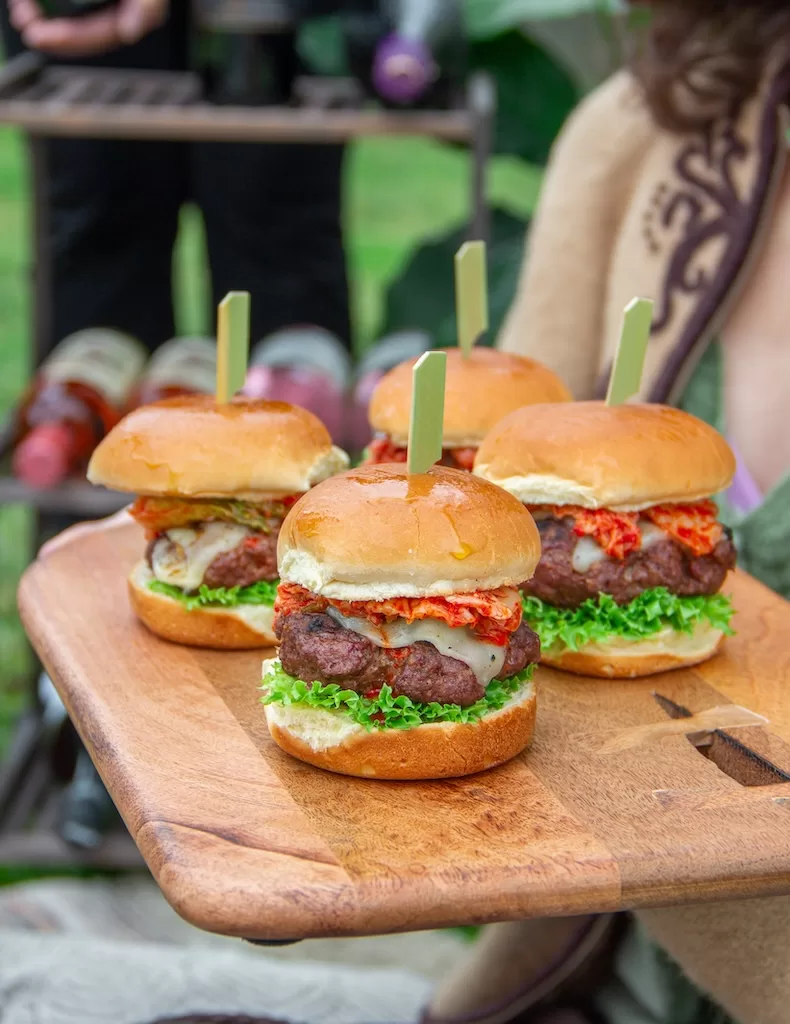
One of my all-time favorite creations is the kimchi burger sliders. Being a huge fan of kimchi, it was no surprise that I came up with this recipe years ago for a client.
Although I never shared it on my website, I believe it’s never too late to do so. Recently, my daughter has developed a love for kimchi as well.
To accommodate her dietary preferences, I usually make turkey or chicken burgers for her, as she no longer consumes red meat.

These little gems, the kimchi burger sliders, have become a family favorite. I truly hope you will enjoy them just as much as we do. The recipe is incredibly simple, requiring only a few ingredients to create a truly delicious dish.
This recipe is foolproof. I’ve been making it for many years and I know that you guys would love it.

Give it a try and don’t forget to share your pictures with me. I am always thrilled to receive emails or DMs showcasing your culinary creations.
Now, I’m curious to know if you’re a fan of kimchi. Would you be interested in making my kimchi burger sliders?
Thanks for your support! Don’t forget to follow me on Instagram, Facebook, or Pinterest; search @sandraseasycooking
Happy Cooking!
BURGER RECIPES:
Build Your Own Burger Board
Chicken Burgers
Classic Patty Melt Sandwich
Simple Halibut Burger
Sandra’s Easy Cooking is part of an Amazon-affiliated program.
Burger Press Heavy-Duty Cast Iron Smash Meat
ThermoPro Digital Instant Read Meat Thermometer
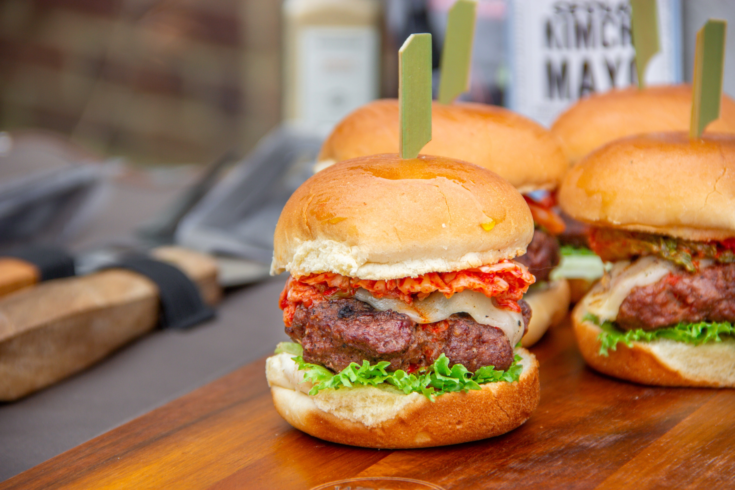
Kimchi Burger Sliders
Ingredients
- 2 pounds ground beef, 80/20
- ½ onion, finely chopped
- 2 garlic cloves, minced ½ bunch Italian parsley, finely chopped 1 tablespoon sweet paprika 2 tsp sea salt 1 tsp black pepper
- 1 whole large egg
- 2 tbsp olive oil
- 1 tsp baking soda
- 1/4 cup bread crumbs
- 2 tablespoons cold water
Topping:
- Sliced Cheese
- 1 cup of kimchi, chopped
- Sriracha Mayo or ay other sauce
- Butter/Bibb or Boston Lettuce
Instructions
- Mix beef, onion, garlic, paprika, sea salt, and black pepper in a medium bowl.
In a smaller bowl or a cup combine mixed large egg, olive oil baking soda, bread crumbs, and water, let it sit for a minute, then add it to the meat and by hand mix until thoroughly combined. - Make meatballs then smash them a bit to create burger patties.
Note* I usually make 2.6-3 oz burger patties for mini burgers and serve them on slider buns to make 6 servings/12 sliders/2-sliders per person. - Grill for 5-7 minutes per side. This depends on how you like your burgers, medium rare or well done, so cook them to your liking. Just before the end of the cooking time toast the slider buns for about 1 minute or so.
- Assemble the sliders by spreading 1 to 2 tsp of any sauce of your choice, we love Sriracha Mayo, on the bottom half of the bun. Add lettuce, and top with a burger patty, cheese slice, and chopped kimchi.
- Complete with a piercing through-the-whole slider with a bamboo pick to hold everything in place. Serve immediately!
Notes
If the cheese slice is too large for the slicer you can cut it into 4 smaller pieces or in half.
Nutrition Information
Yield
6Serving Size
1Amount Per ServingCalories 557Total Fat 37gSaturated Fat 13gTrans Fat 1gUnsaturated Fat 19gCholesterol 176mgSodium 1456mgCarbohydrates 9gFiber 2gSugar 3gProtein 45g
This data was provided and calculated by Nutritionix. Nutrition information isn’t always accurate, but we try our best.
 Italian Meatballs with Orzo
 Charcuterie Snack Plates


June 17, 2025 at 3:44 pm[…] KIMCHI BURGER SLIDERS […]