
Easy Entertaining Appetizer Platter
Easy Entertaining Platter is just that, simple and versatile. My family doesn’t entertain nearly as much as before. However, we love making cheeseboards and platters for family and close friends. …

Easy Entertaining Platter is just that, simple and versatile. My family doesn’t entertain nearly as much as before. However, we love making cheeseboards and platters for family and close friends. …

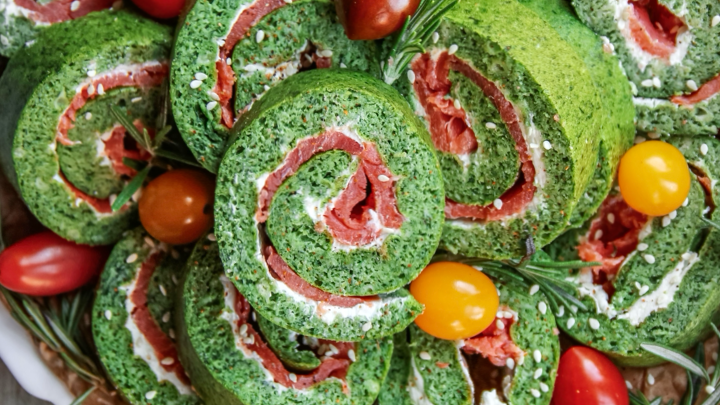
Smoked Salmon Goat Cheese Appetizers are perfect bites to serve over joyous holidays. However, in my humble opinion, these are divine perfection all year round. Sometimes, instead of these rather …
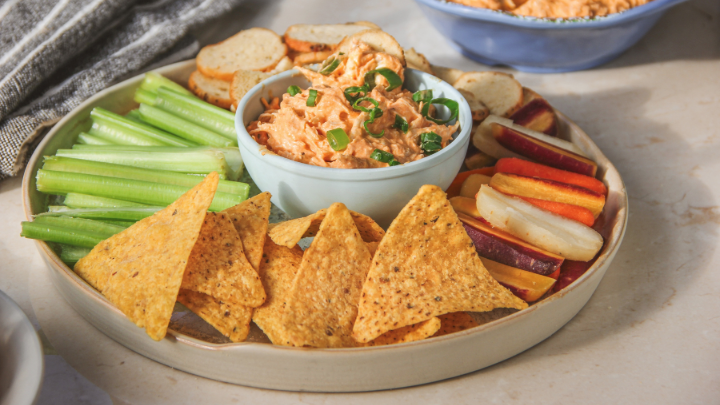
When it comes to creating the perfect appetizer, simplicity often reigns supreme. This recipe was initially intended as a Three-Ingredient No Bake Buffalo Chicken Dip. However, to ensure transparency …

When it comes to Charcuterie Snack Plates, the possibilities are truly endless. You can easily put together a plate that suits your guests’ preferences, whether you have one or ten …
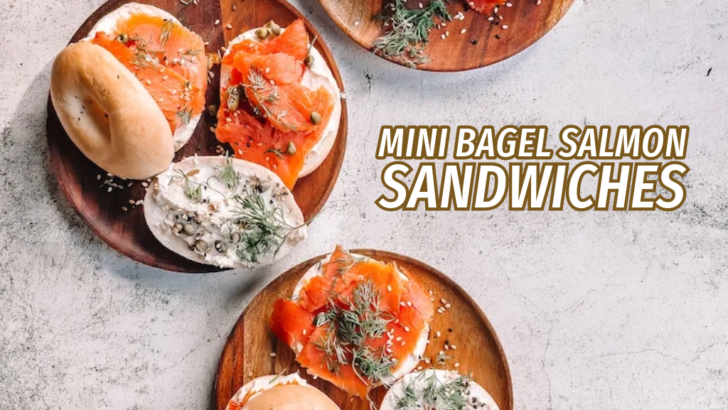
I love Bagel Salmon Sandwiches, mini or not. But anything mini just looks way more appealing. I made already something so very similar for my blog before but I …

There’s something undeniably special about gathering with loved ones to watch a thrilling sporting event on TV. And what better way to enhance the excitement than with a mouthwatering tray …
When it comes to Lox Bagel, there’s no denying its deliciousness. However, for those special holiday occasions, I wanted to create something equally beautiful and tasty just like these Smoked …

– Delightful Finger Food Recipe Our household is particularly fond of feta and phyllo dough, and we enjoy experimenting with various recipes. One standout dish that we highly recommend …

Taco Biscuit Skillet Bites are not only tasty but super easy to make as well as a crowned pleaser. After making my Biscuit and Mozzarella Skillet Bites, I wanted to …

Entertaining is not my strong suit because I value my peace. You see, I’m a natural introvert as well, so I’ve long since quit forcing myself to attend social gatherings …