Search for a recipe: dessert

Chocolate Cupcakes with Marshmallow Cream

Chocolate Cupcakes with Marshmallow Cream

Chocolate Cupcakes with Marshmallow Cream are amazingly delicious. They are even sweeter when made in the company of your kid. When we have breaks from school we love cooking together, making friendly cooking competitions and creating memories. Tap here for more tasty desserts These cupcakes read more

Chocolate Chip Iced Coffee

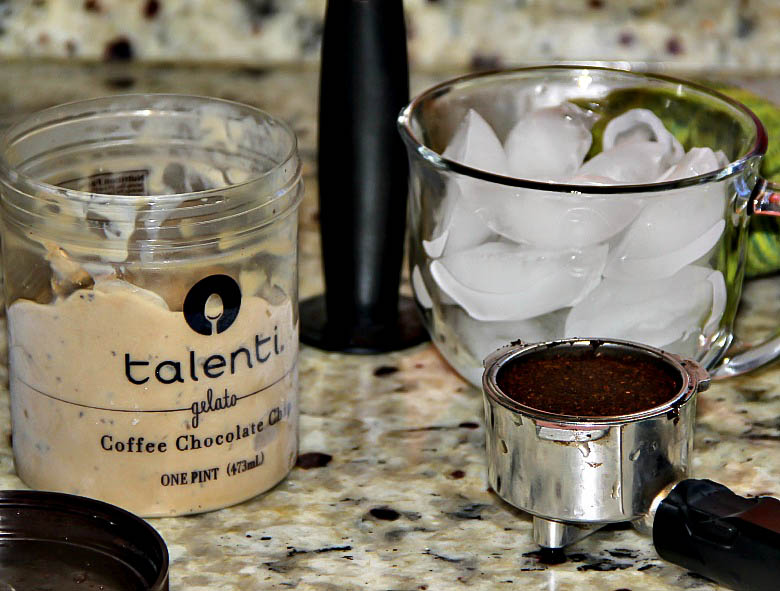
Chocolate Chip Iced Coffee

  Sinful? Yes! Delicious? Yes! Double trouble? Yes! I love double trouble, I live in the moment, I don’t plan anything in life ’cause most of the time I get disappointed so I go with a flow {literally}. I enjoy simple things and truly appreciate them. read more

Sweet Red Bean Bread

Sweet Red Bean Bread

Sweet Red Bean Bread

This soft and fluffy Sweet Red Bean Bread is filled with creamy red bean paste. Inspired by Asian bakery buns—easy, delicious, and perfect for sharing!

Let’s be honest—I’d be lying if I said I didn’t love bread. All kinds. But soft, sweet, warm bread filled with creamy red bean paste? That’s next-level delicious. If you’ve never tried it, you’re in for a treat. And if you have, you know exactly what I mean. These buns are downright irresistible.

🌏 A Global Favorite

This type of sweet bread is a staple across many Asian countries—known as Anpan in Japan, Danpat-bbang in Korea, and loved throughout China, the Philippines, and beyond. Each place puts its own spin on it, but the concept is the same: pillowy bread with a delicious sweet filling.

Even here in the U.S., you can find these goodies at most Asian markets, either made in-house or shipped in from nearby bakeries.

P.S. Want more bread recipes?
👉 Click here for more of my favorites!

Of course, sweet buns and pastries are popular all over the world—many filled with fruit jams, custards, or chocolate. I just happen to have a big soft spot (pun intended!) for sweet red bean paste. I could eat it with a spoon like ice cream. Anyone else guilty?

Sweet Red Bean Bread

💪 Kneading by Hand (But You Don’t Have To!)

I usually knead by hand—there’s something magical about feeling the dough come together under your fingers. But if you want to save time and energy, go ahead and use your stand mixer with a dough hook. Totally up to you!

Sweet Bread filled with Red Bean Paste

Sweet Bread filled with Red Bean Paste


Sweet Bread filled with Red Bean Paste

And if sweet beans aren’t your thing, you can easily swap the filling with sweetened cream cheese, mashed sweet potato, Nutella, fruit jam, or green tea paste. Endless possibilities!

If you try this delightful Sweet Red Bean Bread, tag me on Instagram @sandraseasycooking – I’d love to see your delicious creations!

Yield: MAKES 9 BUNS

Sweet Bread Filled with Red Bean Paste

Sweet Bread Filled with Red Bean Paste

This soft and fluffy Sweet Red Bean Bread is filled with creamy red bean paste. Inspired by Asian bakery buns—easy, delicious, and perfect for sharing!

Prep Time 25 minutes
Cook Time 20 minutes
Additional Time 1 hour 15 minutes
Total Time 25 minutes

Ingredients

  • 2 ¼ cups (about 280g) all-purpose flour
  • ½ tsp salt
  • 1 tsp baking powder
  • 2 tbsp sugar
  • 1 egg, lightly beaten
  • 2 tsp dry yeast
  • ½ cup warm milk or water (for activating yeast)
  • ¾ to 1 cup additional milk or water (add gradually)
  • 3 tbsp butter (room temp or melted)
  • 1 cup sweet red bean paste (store-bought or homemade)
  • Optional: egg wash or melted butter for brushing

Optional toppings:

  • sesame seeds, poppy seeds, shredded coconut

Instructions

  1. Prep Dry Ingredients:
    In a large mixing bowl, combine flour, salt, baking powder, and sugar. Mix well.
  2. Activate Yeast:
    In a small cup, mix yeast with ½ cup of warm milk or water and a pinch of sugar. Let it sit for 5–10 minutes until frothy.
  3. Make Dough:
    Add the beaten egg and activated yeast to the dry ingredients. Mix slightly, then gradually add the remaining milk/water and butter. (You may not need the full amount of liquid—add slowly to avoid a runny dough.)
  4. Knead:
    Mix with a wooden spoon until it comes together, then knead on a lightly floured surface for 25–30 minutes, or until smooth and elastic. Add a bit more flour if needed.
  5. First Rise:
    Place the dough in a lightly oiled bowl, cover with a clean towel, and let rise in a warm spot until doubled in size (about 1 hour).
  6. Shape the Buns:
    Punch down the dough and divide into 9 equal pieces. Flatten each piece into a circle (about 4–5 inches wide).
  7. Fill:
    Spoon about 1 tablespoon of sweet red bean paste into the center of each circle. Pinch the edges together to seal and gently shape into a ball. Lightly flatten into a disk, about 1 to 1½ inches thick.
  8. Design (Optional):
    You can leave them as-is or make decorative slits using a knife, scissors, or pizza cutter. You can also roll them into logs or shape them like dinner rolls.
  9. Final Proof:
    Place buns on a parchment-lined or lightly greased baking sheet. Cover and let rise for 15–20 minutes.
  10. Brush & Bake:
    Preheat oven to 375°F (190°C). Brush buns with egg wash or melted butter and sprinkle with your favorite topping. Bake for 20–25 minutes, or until golden brown.
  11. Cool:
    Let them cool for at least 15 minutes before serving (if you can wait that long!).

Notes

Sweet Red Bean Paste:

You can find canned red bean paste (anko) at most Asian grocery stores. If you prefer homemade, simmer adzuki beans with sugar until thick and creamy.

No Bean Paste? No Problem! Try alternative fillings like:

  • Sweetened cream cheese
  • Mashed sweet potato
  • Matcha (green tea) paste
  • Nutella or chocolate spread
  • Fruit preserves or jam

Shape It Your Way:

Shape into rolls, spirals, logs, or flower-like buns. Decorative cuts are optional but look beautiful once baked.

  • Make Ahead: You can make the dough the night before. After the first rise, refrigerate overnight, bring to room temp, then proceed with shaping and baking.
  • Freeze-Friendly: These buns freeze beautifully! Once cooled, wrap individually and store in a freezer-safe bag for up to 2 months. Reheat in the oven or microwave.
  • Brushing Options: For a golden crust, use an egg wash. For a soft crust, brush with melted butter after baking.
  • Toppings: Sesame seeds, poppy seeds, coconut flakes, or even a sprinkle of coarse sugar add a nice crunch and extra flavor.

Nutrition Information:

Yield:

9

Serving Size:

1

Amount Per Serving: Calories: 343Total Fat: 12gSaturated Fat: 7gTrans Fat: 0gUnsaturated Fat: 4gCholesterol: 58mgSodium: 348mgCarbohydrates: 51gFiber: 4gSugar: 20gProtein: 9g

This data was provided and calculated by Nutritionix. Nutrition information isn’t always accurate, but we try our best.

Did you make this recipe?

Please leave a comment on the blog or share a photo on Pinterest


Nutella and Biscoff Truffles

Nutella and Biscoff Truffles

I love having sweet anything every day, in moderation, of course, but in reality, I am more going toward savory, rather than sweets. Ever since I got a box of these yummy Biscoff cookies I really had to brainstorm what I could make with them, read more

Nutella Cafe Latte

Nutella Cafe Latte

It is one of those days when you feel that sunshine is so necessary to pick me up… yes, it’s cloudy and it will be tomorrow again, and I am in need of sun and bright warm day! It is one of those days when you read more

Classic Chocolate Mousse

Classic Chocolate Mousse

Classic Chocolate Mousse

Here is my CLASSIC CHOCOLATE MOUSSE recipe. Because February is for love, birthdays… and lots of chocolate.

If there’s one thing my family doesn’t mess around with, it’s chocolate. We’re full-blown chocoholics over here. And if the chocolate stash runs dry? No worries—we’ll devour anything sweet within reach. Cookies, candies, frosting off the cupcakes—don’t judge.

Naturally, February is our favorite month. Not just because of Valentine’s Day, but because both my husband and I celebrate our birthdays this month—just 10 days apart! It’s the perfect excuse to indulge in a little extra pampering, a few romantic dinners, and of course… decadent, velvety desserts.

That’s where this Orgasmic Classic Chocolate Mousse comes in. I tested it early this year (because why wait?), and let me tell you—it passed my husband’s chocoholic test with flying colors. And yes, he’s that kind of chocolate critic, so his thumbs up are 100% legit.

Classic Chocolate Mousse

Chocolate Mousse, Two Ways – Because Life Calls for Options

Whether you’re in the mood to whip something fancy or just want dessert in five minutes flat, I’ve got you. This mousse comes in two glorious versions:

  • The Lazy Genius: Quick, easy, no eggs. (Your little secret.)
  • The Classic Indulgence: Homemade from scratch and absolutely divine.

Lazy Genius Chocolate Mousse (5-Minute Fix)

Perfect for busy days and last-minute guests

Ingredients:

  • 1 box instant chocolate pudding (the kind that uses cold milk)
  • 2 cups cold milk
  • 1 cup whipped cream or Cool Whip

Optional: chocolate shavings, berries, or extra whipped cream for topping

Directions:

  1. Whisk pudding mix and cold milk until thick (about 2–3 minutes).
  2. Gently fold in whipped cream.
  3. Spoon into serving glasses or jars.
  4. Chill for at least 30 minutes.
  5. Top with anything your heart desires.

Shortcut Tip: Nobody needs to know this came from a box. Just serve it in pretty glasses and act like it took hours. I won’t tell if you don’t.

steps how to make chocolate mousse

Classic French-Style Chocolate Mousse

Rich, creamy, and totally worth the effort

Ingredients:

  • 3 pasteurized eggs (yolks and whites separated)
  • ⅓ cup granulated sugar (66g)
  • 2¼ cups heavy whipping cream, divided (540mL)
  • 1 teaspoon vanilla extract
  • 8 oz semi-sweet chocolate, finely chopped

Optional toppings: Whipped cream, chocolate shavings, fresh berries

Directions:

  1. In a large bowl, whisk egg yolks and sugar for about 1 minute until pale and velvety.
  2. Heat 1¼ cups of cream in a small saucepan over medium heat until steaming (do not boil).
  3. Remove from heat and stir in chopped chocolate until melted and smooth. Now is the time to add any flavoring. I used vanilla extract, but you can add mint, espresso, or orange liquor, etc. 
  4. Gradually whisk the chocolate mixture into the egg yolks. Set aside to cool, stirring occasionally, until just warm to the touch (about 30 minutes).
  5. In another bowl, beat egg whites until stiff peaks form. Fold in ⅓ of the whites to lighten the mixture, then fold in the rest.
  6. Beat the remaining 1 cup of cream to stiff peaks and fold it into the mousse.
  7. Spoon into small glasses or ramekins. Chill at least 4 hours or up to 2 days. (Loosely cover if chilling overnight.)
  8. Top with whipped cream, chocolate curls, or fruit just before serving.

How to Pasteurize Eggs at Home (Quick DIY)

If you’re using raw eggs and want to be safe:

  1. Heat water to 135°F–140°F.
  2. Remove from heat, and gently place eggs in the water.
  3. Let sit for 2–3 minutes, then remove and dry.

Done! Your eggs are now pasteurized and safe to use in recipes like mousse or tiramisu.

Topping Ideas & Flavor Boosts

  • Fresh raspberries, cherries, or mixed berries
  • Crushed cookies, brownie bits, or graham cracker crumbs
  • Chocolate curls or cocoa nibs
  • A splash of espresso or a drizzle of hazelnut liqueur
  • Dairy-free whipped topping for a non-dairy option

Whether you’re going all-out with the classic mousse or taking the shortcut (because life is busy!), this dessert is a total showstopper. It’s rich, creamy, and absolutely swoon-worthy. Perfect for birthdays, Valentine’s, anniversaries—or a random Tuesday night when you need something sweet.

Let me know in the comments—are you Team Classic or Team Lazy Genius

Recipe you might like:

Pumpkin Choux Pastry with Chocolate and Vanilla

No Bake Carlota de Limon Cheesecake

Hey, if you decide to make my easy and delicious Classic Chocolate Mousse, please let me know in the comments. And share it with me on social media such as Instagram or Facebook; @sandraseasycooking with the same hashtag #sandraseasycooking.

I am also creating a list on Amazon for cooking essentials, so stay tuned.

 
Yield: 6 Servings

Classic Chocolate Mousse

Recipe for Chocolate Mousse

Rich, creamy, and totally worth the effort

Prep Time 40 minutes
Chill Time 4 hours
Total Time 4 hours 40 minutes

Ingredients

  • 3 pasteurized eggs, yolks and whites separated
  • ⅓ cup (66g) sugar
  • 2¼ cups (540mL) heavy whipping cream, divided
  • 1 teaspoon vanilla extract
  • 8 oz semi-sweet chocolate, finely chopped, about bar and a half
  • Optional toppings: Whipped cream, chocolate shavings, fresh berries

Instructions

  1. Heat 1¼ cups of cream in a small saucepan over medium-high heat until steaming (do not boil).
  2. Remove warm cream from heat and stir in chopped chocolate until melted and smooth, and add any flavor. I used vanilla extract.
  3. In another bowl, whisk egg yolks and sugar for about one minute or until pale and velvety.
  4. Gradually whisk the chocolate mixture into the egg yolks. Set aside to cool, stirring occasionally, until just warm to the touch, about 10 to 15 minutes.
  5. In another bowl, beat egg whites until stiff peaks form. You can use your stand mixer. Fold in ⅓ of the whites to the creamy chocolate mixture just to lighten it up, then fold in the rest of it.
  6. Using your mixer or stand mixer, beat the remaining 1 cup of heavy cream into whipped cream. Stop when you see stiff peaks, then fold it into the mousse.
  7. Gently spoon or pour into small glasses or ramekins. Chill at least 4 hours or up to 2 days. I like covering it loosely with plastic wrap and leaving it overnight in the fridge.
  8. Top with whipped cream, chocolate curls, or fruit just before serving.

How to Pasteurize Eggs at Home (Quick DIY)

  1. If you’re using raw eggs and want to be safe:
  2. Heat water to 135°F–140°F.
  3. Remove from heat, and gently place eggs in the water.
  4. Let sit for 2–3 minutes, then remove and dry.
  5. Your eggs are now pasteurized and safe to use in recipes like mousse.

Nutrition Information:

Yield:

6

Serving Size:

1

Amount Per Serving: Calories: 286Total Fat: 19gSaturated Fat: 11gTrans Fat: 0gUnsaturated Fat: 7gCholesterol: 137mgSodium: 45mgCarbohydrates: 28gFiber: 3gSugar: 23gProtein: 6g

This data was provided and calculated by Nutritionix. Nutrition information isn’t always accurate, but we try our best.

Did you make this recipe?

Please leave a comment on the blog or share a photo on Pinterest