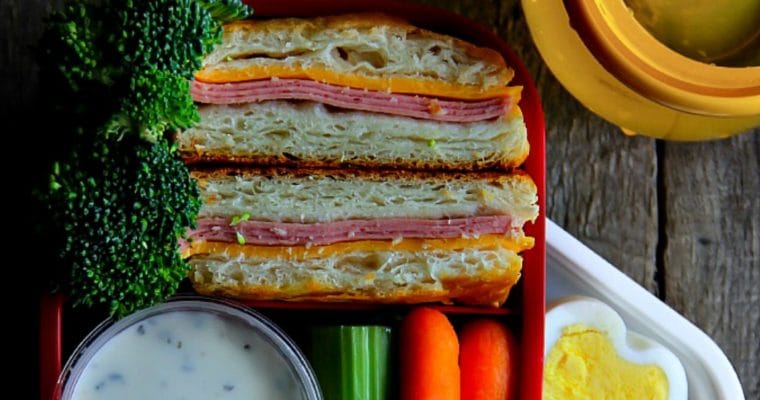
Search for a recipe: lunch box

Lunch Box: Stuffed Bread

Lunch Box: Stuffed Bread

These are perfect, obviously, for lunch boxes for school or work, but also fantastic to take on trips, potlucks, and picnics.

Lunch Box: Oven-Baked Panko Chicken

Lunch Box: Oven-Baked Panko Chicken

Lunch Box: Baked Panko Chicken

SCHOOOOOLLLL!!! Is starting tomorrow for us!!! Don’t know if I hate it, or like it…HA!!! Who am I kidding? I love it!!! Doing my happy dances all day…


I know I will miss our mornings soon, but as far as of right this moment, it is a happy day indeed for “moi”…

Like I said before I started planning and testing recipes with my kids. So far it’s been good, and they loved each of them. This one was a winner today, so I thought to post it.

My daughter, Anna loves when I make funny faces for her lunch boxes, and I’m planning to post soon something more for boys.

Lunch Box: Baked Panko Chicken


My oldest one loves these, but he would never ever take it to school. Instead, I mix rice and peas, with few sprinkles of toasted sesame seeds and drizzle of sesame oil and he is a happy camper.

That’s when they step into the teenage stage…nothing cute could be offered!!! 

Again, I have to say that you DO NOT have to make the same exact lunch box. I started with this to inspire and motivate others to start, because school lunches are…ahhh~ how to put it, hm! Well, they are pretty disgusting!

Click here for more lunch box ideas

There, I said it again out loud! But it’s the truth, and I get so mad at myself when I don’t make a lunch box for them. Usually, I bring later to school and around lunch time, if I forgot to prepare night before.

I guess I can say that I am lucky one that can work on her own pace, so I do always have time to enjoy lunchtime with kids at school.

Lunch Box: Baked Panko Chicken


Q: What Box is safe for me and my child?
A: Look for the boxes that have clear written label that they are BPA FREE just in case if they are plastic- BPA stands for bisphenol. BPA is an industrial chemical that has been used to make certain plastics and resins since the 1960s.


Seeking out BPA-free products may not always be easy to do. Some manufacturers do label their products as BPA-free, but some do not. If a product isn’t labeled, keep in mind that most aluminum cans or bottles have linings that contain BPA, while steel bottles or can do not. Polycarbonate plastic is generally hard, clear, lightweight plastic. It often has the No. 7 recycling symbol on the bottom. (source Katherine Zeratsky, R.D., L.D.from Mayo-clinic)

◾ When you are making food at night for the next day lunch boxes make sure about the box like mentioned above. Always preheat food after taking it out of the fridge, let it cool down a bit then close the lid. 

◾ IF you are using seasoned PANKO bread crumbs, be careful how much seasoning/salt you are using on chicken. If your breadcrumbs are plain to make sure to season it. TASTE and see!!! 

◾ For this, I used long grain rice, but it is best if you use short grain premium rice. The best results.

Lunch Box: Baked Panko Chicken

Lunch Box: Oven-Baked Panko Chicken

For 2 Lunch Boxes
Author Sandra | Sandra’s Easy Cooking

Ingredients

  • 1/2 Tbsp. Oil
  • 1 1/2 Cup Seasoned Panko Bread Crumbs
  • 1/3 tsp. Chili Flakes *optional
  • 1 Tbsp. heaping Grated Parmesan
  • 1 Chicken Breast
  • 1-2 Eggs
  • Salt or another seasoning just a sprinkle

Other ingredients used:

  • A dip of your choice ketchup, mayo, mustard, etc.
  • 1 Cup Cooked Rice for each lunch box -for the facial features: seaweed  bologna, eng. cucumber skin, toasted sesame seeds
  • 1 cup of cooked Peas
  • Lettuce
  • Tomatoes cherry
  • Cucumber
  • Watermelon/Blueberry or any other fruit

Instructions

  1. few minutes, until golden on medium temperature. Set aside.
  2. Cut chicken into long thin strips; season it just a little with salt or any other seasoning that you like(I used about few pinches of Kick’s Chicken® Seasoning on all)
  3. Mix eggs and dip each chicken strip into mixed eggs. You can also dip on all sides into all-purpose flour (if you desire) before dipping it into mixed eggs, but I skipped that part -you are more than welcome to do it.
  4. After dipping into mixed eggs, roll the chicken strip into the toasted breadcrumbs. It should be coded on all sides.
  5. Place chicken into well greased baking pan/nonstick baking pan/or lined with parchment paper.
  6. Place a baking pan into a fridge for 15 minutes or 10 minutes into a freezer. (it could be also in the freezer overnight, just make sure to place it in airtight ‘freezer’ safe container)
  7. Preheat the oven on 350°F-375°F-depending on your oven (180°C-190°C/4-5 Gas)
  8. Bake for 20 minutes or until food/chicken thermometer reads 160-170°F (according to by food safety.gov)
  9. Take it out and cover with a paper kitchen towel until ready to be packed. Also, it could be placed in a container with a fitted lid, and in the fridge after it has been cooled down.

Recipe Notes

  • For the rice apple face, I had molds but you can use any mold if you have it, or you could make a rice ball too. For the facial features, I used dry seaweed for the eyes, bologna for the cheeks, and nose. Tomato for the lips.
  • Toasted sesame seeds for the freckles. For more tips on how to make rice for fun decorative bentos CLICK HERE
  • My Amazon Store with Fun Items HERE

[amazon_link asins=’B07956JL61′ template=’ProductGrid’ store=’welcosblog00b-20′ marketplace=’US’ link_id=’d00010fc-d01b-43d9-a9b9-7b77e8966b60′]

Lunch Box: Spaghetti with Beef Sauce

Lunch Box: Spaghetti with Beef Sauce

Lunch Box: Spaghetti with Beef Sauce

Lunch Box: Rice Mukimame Chicken Wings

Lunch Box: Rice Mukimame Chicken Wings

Lunch Box Rice Mukimame Chicken Wings 

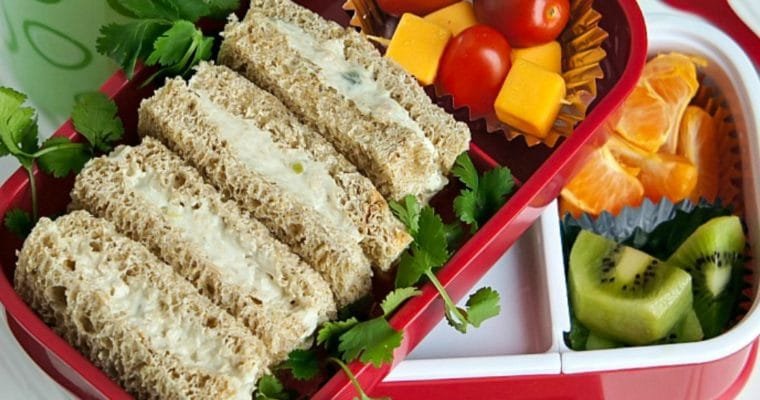
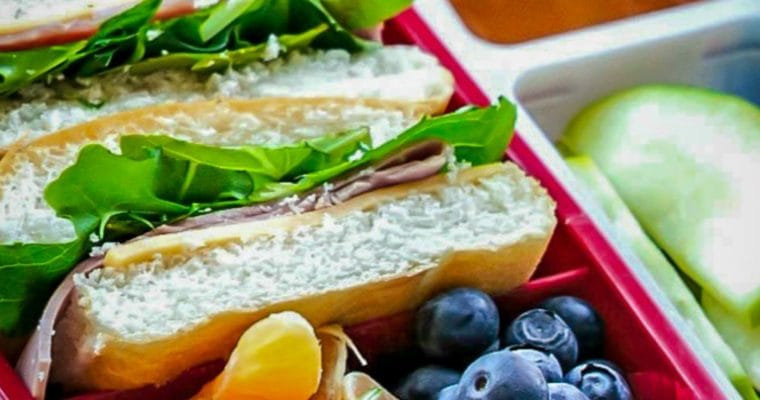
One more lunch box idea for you to try, of course, you may add what you have and like but it is simple and delicious…on top of all my daughter loves it! 


Chicken, Rice, and Biscuits I made the night before, and 30 minutes before I start packing lunch I boiled an egg, and preheated everything and sprinkled a few toasted sesame seeds for the crunch and the taste. 

Lunch Box Rice Mukimame Chicken Wings 


Mukimame is shelled edamame or soybeans. It was frozen so I just steamed it for a few minutes and it makes a wonderful and healthy companion to rice as well as to the chicken. 

I added Green apple, Tomatoes, and Cheese Skewer and Chocolate as well as juice to make it more interesting and colorful when she opened up her lunch bag. 

Lunch Box: Rice Mukimame Chicken Wings

Author Sandra | Sandra’s Easy Cooking

Ingredients

  • Cooked Rice w/ sesame seeds
  • Mukimame shelled edamame -soybeans
  • Spicy chicken wings
  • Biscuit
  • Boiled egg
  • Tomato and cheese skewer
  • Chocolate
  • Juice
  • Apple
Lunch Box: Ham sandwich with Fresh Fruits and Veggies

Lunch Box: Ham sandwich with Fresh Fruits and Veggies

This lunch box series making me happy and the reason why, because I can give you an idea of how simple it is to put one lunch box…correction one ‘happy’ lunch box together

Lunch Box: Panda Bento

Lunch Box: Panda Bento

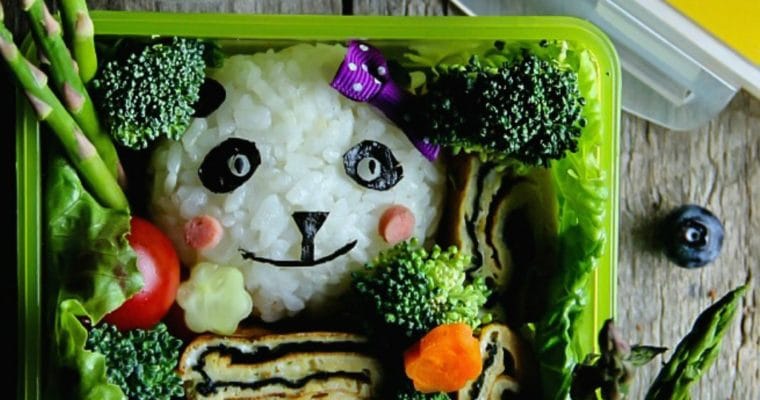
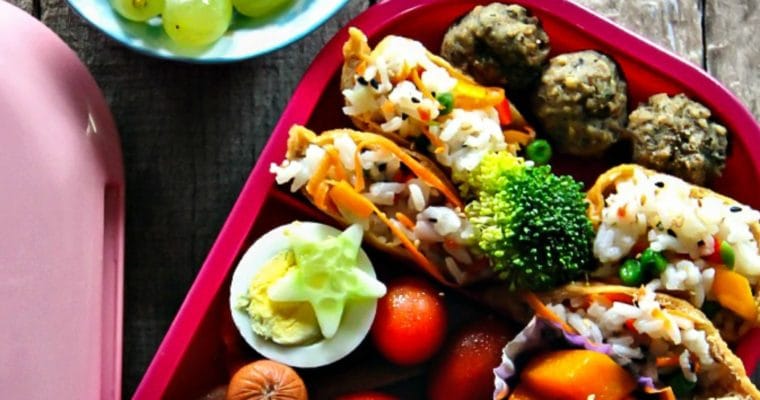
One of my favorite animals is pandas. They are so cute and cuddly…I even have a panda pillow, and I am not kidding! So, I got really inspired by Pinterest bento ideas, especially ones that have a panda. There is not much work here, just read more

Lunch Box: Korean sushi Roll, Kimbap

Lunch Box: Korean sushi Roll, Kimbap

Lunch Box: Korean sushi Roll, Kimbap

Happy April 1st My favorite month is finally here.

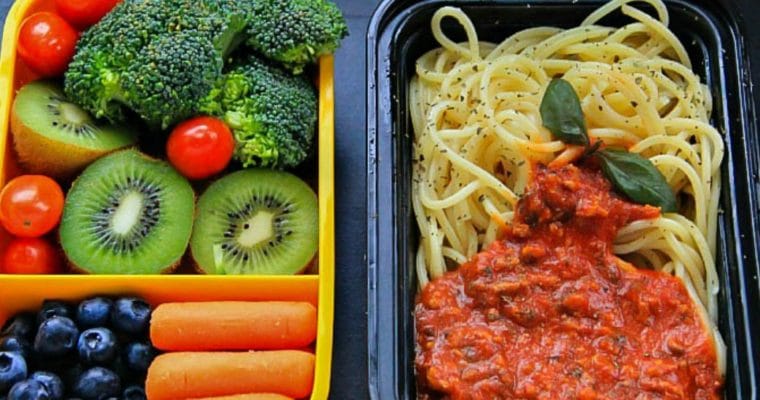
I love April so I am sharing one my favorite to go lunches-it’s simple, easy, delicious and so colorful: Kimbap or Gimbap!

I had so much fun yesterday with the kids. It was raining, we stayed indoors but I already had a plan in my head how to make my kids entertained.

I set up everything and prepared it on the dining room table- they were so happy when I told them that they will learn how to make kimbap.

Trust me if my 10 years old can do it, you can do it too.
Today they went to school proud of themselves because they prepared kimbap and their school lunch.

Click here for more Korean inspired Recipes

Delicious lunch box-kimbap(bento, dosirak,dosilag 도시락

I made Kimbap many times before but always with different filling and they are really versatile. You may use ingredients whatever you or your kids like. They are similar to Japanese Makizushi or Maki Roll (Futomaki-fat roll).

The difference is in rice preparation and any kind of Japanese rolls are usually served with soy sauce, wasabi and pickled ginger (gari). The Kimbap commonly is not.
Kimbap is a Korean traditional Picnic/Finger fast
food.

So let’s get started:

Yield: 4 SERVINGS

Korean Sushi Roll, Kimbap

Korean Sushi Roll, Kimbap

Delicious lunch box-kimbap

Prep Time 20 minutes
Total Time 20 minutes

Ingredients

  • 4 cups cooked sushi rice
  • 1 tbs. Rice vinegar
  • Pinch of Salt
  • 1 tbs. Sesame Oil + for brushing on the rolls
  • Dry Seaweed sheets (kim/gim)
  • filling options:
  • Plain
  • Omelet
  • fresh
  • carrots, julienned
  • peppers
  • asparagus
  • pickled daikon (white radish)
  • American
  • cheese
  • kimchi
  • avocado
  • toasted sesame seeds
  • tuna/ham/spam/chicken/beef, it can be any meat, or you can keep it vegetarian

Instructions

  1. Put about 4 cups of good quality premium sushi rice in the pot with the water. (wash the rice then cook, put water about a finger thick above the rice which is about less than 1 cm/0.4 inches) Once the rice boils, turn it down, stir, cover and let it simmer to the lowest temp for 10 minutes. Take it off and let it be under the closed lid for 5 more minutes; Fluff the rice and place in a large plastic bowl. If you have a rice cooker then follow the instructions. 
  2. Make your mixing sauce by mixing up salt, vinegar until the liquid looks clear, then add sesame oil. Mix
  3. rice with the mixing sauce and stir it evenly; Set aside!
  4. Prepare a large plate to arrange all ingredients for kimbap by slicing it into thin strips-preferably the same size. 
  5. Place on the sushi/kimbap mat dry seaweed then put a bit of rice but do not go all the way from one end to the other-try to keep it from the sides and you can adjust the thickness; again don't go too thick because it will be hard to roll. Click Here for better instruction.
  6. Put the ingredients on the top side by side that you wish to use and roll it. Brush each uncut roll with sesame oil and cut into bite size rolls, but you can eat them without cutting. 
  7. You can store them in an airtight container and in the fridge for up to two days although they are the best when eaten fresh.

Did you make this recipe?

Please leave a comment on the blog or share a photo on Pinterest